Parts and Frame

I've been slowly gathering material for the last month, and I now finally have enough to justify a web update.

Parts

I've bought just about everything I need. I have drill motors and gearboxes for drive and weapon, polycarbonate for armor (I'm only going to use about 2/3 of my 4x8 sheet), steel tubing and welder for the frame, batteries, a new faster charger, and a linear actuator. I've even purchased a 0.08 megapixel digital camera so I can add lots of blurry, low-resolution pictures to amaze and confound you.

Frame

Halo's frame
Halo's frame (not yet finished)
Over the last week, I've measured and cut all of the tubing I'm going to need for my frame. I've done most of the drilling and some of the welding. This frame is reasonably square and the welds seem okay -- I'm pretty happy with it as a first effort in welding.

The frame consists of an outer box that is thirty inches long by twenty-four inches wide by ten inches deep. There are two inner rails that serve to strengthen the box and also to give a mounting point for the inner wheel bushing. I'll be welding in eight more 8.5-inch vertical posts (two per wheel) to act as wheel supports, and two more crossbeams across the bottom to serve as a mounting point for the motors.

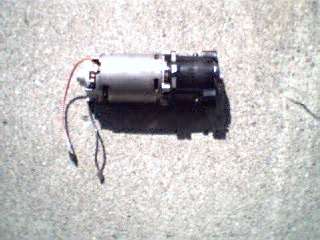
DeWalt motor and gearbox
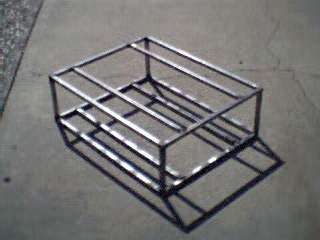
I would have preferred to make something without such a square aspect ratio, but the DeWalt motors and gearboxes are five inches long and the wheel is 3.5 inches wide. I wanted to use direct drive for simplicity, so the body has to be at least 20 inches wide.

I've already made one goof: the inner rails are parallel to the outer rails, but the gap between them isn't the same everywhere. I set everything up carefully with a square, but I stupidly didn't tighten the nut on the square so it slid up and down. The difference was small enough that I didn't notice it at the time. Fortunately, all of the gaps are wide enough for the wheels.

I drilled holes in the outside faces of the tubing before welding so that I could easily fit the tubing in my drill press. With Rott-bot 2000, I was drilling armor mounting holes with a hand drill after the welding, so the holes weren't square to the face of the tubing or necessarily centered across the tubing. I'm using tapped holes to mount the armor this year rather than nuts and bolts. Most of the holes aren't yet tapped.

Paperwork

I've sent my entry form to the BattleBots powers-that-be!

Previous: Plans Next: Axle


This page works best with Lynx.
mail me or go home.