Frame and Axle Work

I hoped to get more done this weekend, but as usual things took longer than expected, and I had a setback to boot.

Axle

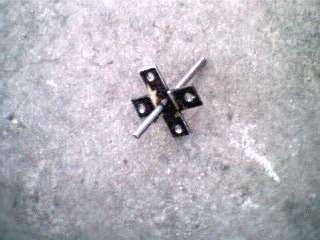
Halo's axle
Halo's axle (one of four)
The design of the axle is pretty simple: a length of 5/16 drill rod with an "X" of steel welded onto it as a hub. I'm not sure if the drill rod reacts well to welding, I am going to have to do some strength tests on it. The wheels I have (recycled from Rott-bot 2000) have a split-rim design, and the bolts that hold the two halves of the rim together are doing double duty as hub mounts. Actually, I'm going to have to replace the bolts with ones that are a quarter-inch or so longer, so that the nuts will grab enough thread.

I have brass sleeve bearings for the axle, but either the axle is a little bigger than 5/16" or the bearings are a little smaller, because they don't fit. The right way to remedy the situation would be a lathe. I don't have a lathe. I chucked the axle into a power drill and sanded a few thousandths of an inch off it.

I'm going to have to do some work to carve a sort of Philips head into the end of the drill rod, in order to mate it to the DeWalt gearbox. I'm not looking forward to this, I'm a butcher with a Dremel.

Suspension

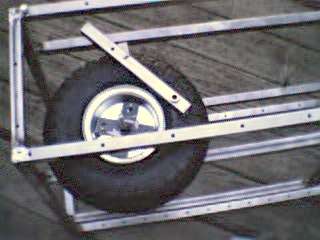
Suspension problems
Hm, that's not going to work
Unfortunately, I ran into a problem: my original design with two welded support posts would completely trap the axle. There would be no way to replace it -- or even replace a shredded tire -- once I welded in the posts. There's not enough room between the front-to-back rails to twist things out. It's like one of those stupid puzzles, except I don't think that this one has a solution.

Fortunately, I haven't yet welded anything in place (I wanted to have the axles built in order to help with the alignment of the posts). My new plan is to weld the inner post in place, and then make a kind of bracket for the outer post, to keep it from moving forward, backward, or inward. The layer of polycarbonate armor will (knock wood) keep it from moving outward.

I've done some tapping of the holes (note the bolt in the upper left of the picture). It's very relaxing work. I'm sure I'll continue to enjoy it until I break a tap.

By the way, the camera I'm using to take these pictures is the one that is included with Cosmopolitan Virtual Makeover 2. I bought it on sale a local software store because I thought that $20 for a digital camera was a pretty good deal. I may use the software later to show my robot with a new hairstyle.

Paperwork

BattleBots sent acknowledgement of my paperwork, so I'm definitely entered in BBLV2000!

Previous: Frame Next: After the event


This page works best with Lynx.
mail me or go home.